Introduction
AppVeyor is Continuous Integration service for Windows developers to securely build and test code in parallel and deploy successful bits to on-premise or cloud environments.
In this tutorial we’ll guide you through the process of setting up a continuous delivery process for sample Azure Cloud Service (Azure CS) application starting from a code push to a repository and finishing with deployment of successful build to Azure.
Note to Global Windows Azure Bootcamp attendees
On Saturday, March 29, 2014 Global Windows Azure Bootcamp (GWAB) will take place in 141 locations across the globe. If you are not registered yet go find a location near you and do that. AppVeyor CI is one of the sponsors of this event and during that time we will be giving 2 free months with the purchase of any AppVeyor plan to all GWAB attendees.
AppVeyor CI has tight relationship with Windows Azure platform. First of all, AppVeyor is built for Azure and it uses Azure IaaS to run your builds on dedicated virtual machines. Second, AppVeyor provides complete Continuous Delivery cycle for Azure projects, i.e. building, testing, packaging and deploying your web applications and Azure Cloud Services. GWAB training classes is a wonderful place to try AppVeyor and setup super-simple continuous integration for your lab project.
Sample project on GitHub
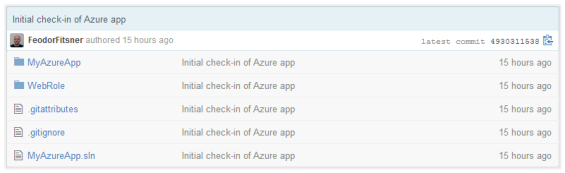
We’ve created a simple Azure Cloud Service solution created in Visual Studio 2013 and consisting of a WebRole and xUnit test projects. You can find sample project repository on GitHub.
Note, that we don’t have “NuGet Package Restore” enabled for VS solution (no .nuget folder in repository). This is not necessary in AppVeyor environment - below you’ll see how to do that.
Sign up for AppVeyor account
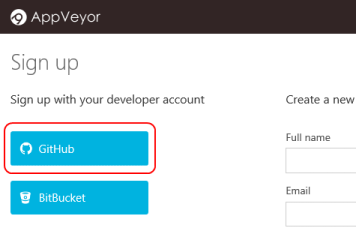
If you don’t have AppVeyor account yet you should definitely get one! Go to https://ci.appveyor.com/signup and use “GitHub” button to sign up for Free plan which allows you building public repositories.
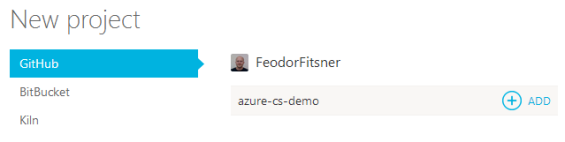
Add new project
Click New project and select GitHub repository:
AppVeyor will automatically configure webhook for the repo to start a new build on every push.
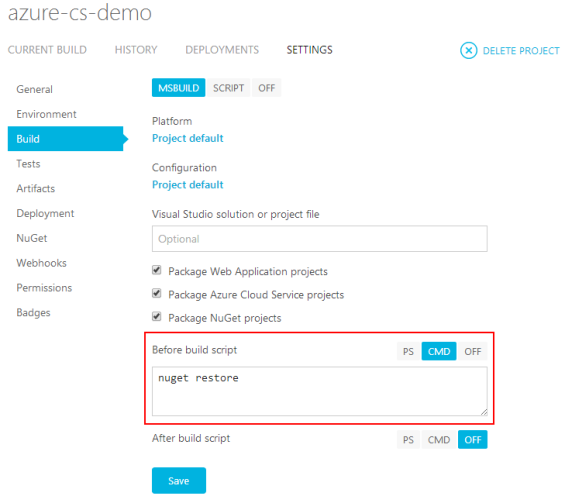
Enable NuGet packages restore
To enable restore of NuGet packages during the build open project settings and add “nuget restore” command into before build script:
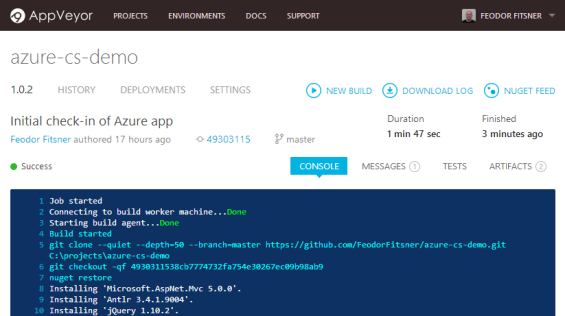
Start new build
Run New build and see its progress in a real-time build console:
If you click Artifacts tab upon build completion you will see that AppVeyor automatically detected and packaged Azure Cloud Service project along with its configuration:

In just a few minutes we have a pretty decent Continuous Integration process for our Azure Cloud Service!
Add new Azure Cloud Service environment
Now let’s deploy our “experimental” app to Windows Azure. Go to Environments and add new “Azure Cloud Service” environment:
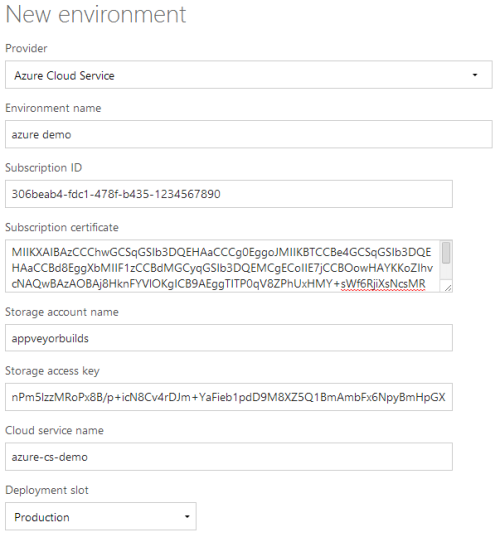
The form requires 3 prerequisites:
- Your Windows Azure account subscription details (Subscription ID and certificate).
- Storage account for uploading Azure CS package (.cspkg file produced during the build) and then deploying from it.
- Cloud Service to deploy to.
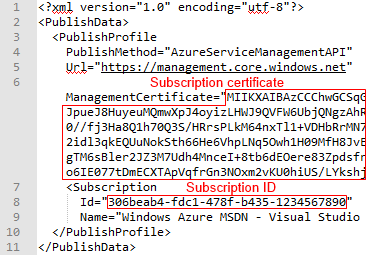
Subscription details
Download Azure account publishing profile and open it in text editor. Copy subscription ID and Base64 encoded subscription certificate.
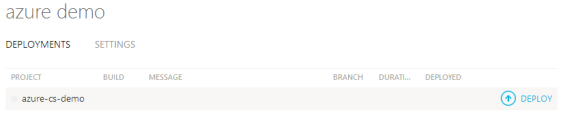
Start new deployment
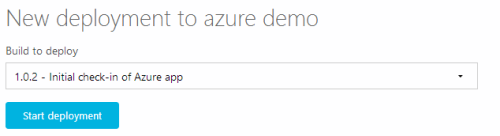
Now kick off new deployment of azure-cs-demo project to azure demo environment:
Select the build to deploy:
Observe the progress of deployment in the real-time console:

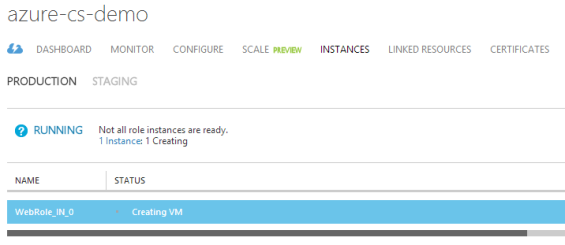
Azure Cloud Service package from build 1.0.2 artifacts has been deployed and you can see the results in Azure Portal:
Deploying as part of the build
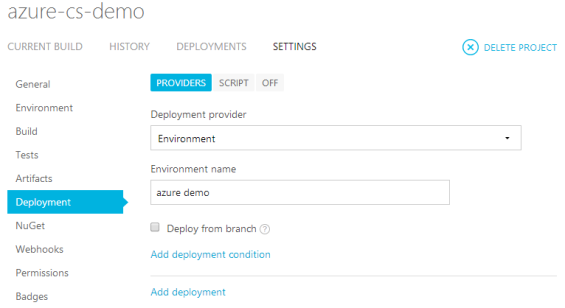
Now after we triggered deployment manually from UI we’d like to completely automate the process and deploy during successful build. To setup deployment to azure demo environment open “Deployment” tab of project properties, add new “Environment” deployment and specify “azure demo” as environment name:
Done! Next time you push your changes into GitHub repository or start a new build on UI AppVeyor will build solution, run tests and deploy to Azure.
Enjoy!