Deploying Azure Cloud Services (classic)
- Automatic packaging
- Packaging from script
- Configuring deployment
- Generating Azure management certificate
- Cloud Service Deploy Parametrization
Azure Cloud Service (classic) deployment provider assumes there is only one Azure Cloud Service package (file with .cspkg extension) in build artifacts and at least one Azure Cloud Service configuration artifact (file with .cscfg extension).
Automatic packaging
To build Azure CS project and automatically push it as artifact enable Publish Azure Cloud Service projects option on Build tab of project settings.
To enable packaging of Azure CS projects in appveyor.yml:
build:
  publish_azure: true
AppVeyor will find Azure Cloud Service project (.ccproj) and package it. Created Cloud Service package (<project-name>.cspkg) and default “Cloud” configuration (<project-name>.cscfg) will be published to build artifacts. In addition to that all .cscfg files found in Cloud Service project folder are pushed to artifacts with names <project-name>.<config>.cscfg. Build artifacts page would look like below:
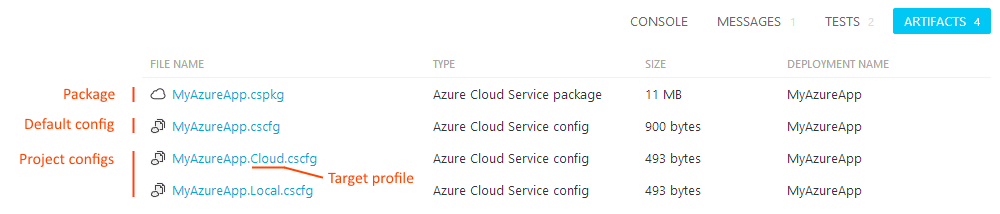
If you get error WAT200: No default service configuration "ServiceConfiguration.cscfg" could be found in the project build error while using automatic package then you should define TargetProfile environment variable with the name of configuration you’d like to build:
environment:
  TargetProfile: <your-target-profile-name>
Packaging from script
To build Azure Cloud Service package from the script you can use the following command:
msbuild <azure-cs-project>.ccproj /t:Publish /p:PublishDir=%APPVEYOR_BUILD_FOLDER% /p:TargetProfile=<config>
To push package and configuration to artifacts:
appveyor PushArtifact <azure-cs-project>.cspkg
appveyor PushArtifact ServiceConfiguration.<config>.cscfg -FileName <azure-cs-project>.cscfg
Replace <azure-cs-project> with the name of your Azure CS project and <config> with the name of target configuration, e.g. Cloud, Local.
Configuring deployment
Sample appveyor.yml configuration:
deploy:
  provider: AzureCS
  subscription_id: 0C8CCAAC-03F4-4659-B927-EFAB8874BE8D
  subscription_certificate:
    secure: WJjB4oIJKDRXRkaP2hB5Dnoaq1AXOPxf/d2gs0M0Pu6kW0SFBOVw ... z9SVqWcnozkHxylgwaaFA==
  storage_account_name: mystorage
  storage_access_key:
    secure: XMdn4xfPcYlZFYgvbytc8Q==
  service: myazure-service
  slot: production
  deployment_label: $(APPVEYOR_BUILD_VERSION)
  artifact: myservice.cspkg
  target_profile: Cloud   # optional .cscfg configuration name to deploy with
  do_not_start_deployment: false
  recreate_deployment: false
To get subscription_id of your Azure subscription navigate to Subscriptions blade in Azure Portal.
The following section explains how to configure Azure management certificate and get the value of subscription_certificate setting.
Generating Azure management certificate
AppVeyor uses “classic” Service Management API to manage Azure Cloud Service resources. X509 certificate required for Service Management API authentication. In the current Azure Portal there is no built-in functionality to download pre-generated management certificate, but, instead, it should be generated by developer and uploaded to portal in .cer format.
To generate certificate on your developer machine you will need OpenSSL and PowerShell.
Open PowerShell and run the following commands:
# generate new certificate and export it in both PFX and CER formats
$cert = New-SelfSignedCertificate -DnsName management.azure.cloudapp.net -CertStoreLocation "cert:\LocalMachine\My" -KeyLength 2048 -KeySpec "KeyExchange"
$password = ConvertTo-SecureString -String "Password12" -Force -AsPlainText
Export-PfxCertificate -Cert $cert -FilePath ".\azure-manage-cert.pfx" -Password $password
Export-Certificate -Type CERT -Cert $cert -FilePath .\azure-manage-cert.cer

# remove password from PFX certificate
openssl pkcs12 -in azure-manage-cert.pfx -password pass:Password12 -nodes -out temp.pem
openssl pkcs12 -export -in temp.pem -passout pass: -keypbe NONE -certpbe NONE -nomac -out azure-manage-cert.pfx
del temp.pem

# convert PFX certificate to Base64 string
[Convert]::ToBase64String((Get-Content -Path ".\azure-manage-cert.pfx" -Encoding Byte)) | Out-File ".\azure-manage-cert.pfx.txt"
In Azure Portal navigate to Subscriptions → <your subscription> → Management certificates and upload azure-manage-cert.cer.
Contents of azure-manage-cert.pfx.txt is the value of subscription_certificate deployment provider setting. Encrypt that string before inserting into your appveyor.yml.
Cloud Service Deploy Parametrization
When deploying Cloud Services to different environments you don’t want to re-build application package every time with different configurations, but you want to deploy the same package (artifact) with some environment-specific settings configured during deployment. When using Cloud Service Deploy the problem can be easily solved by Cloud Service Deploy parametrization.
Setting parameters during deployment
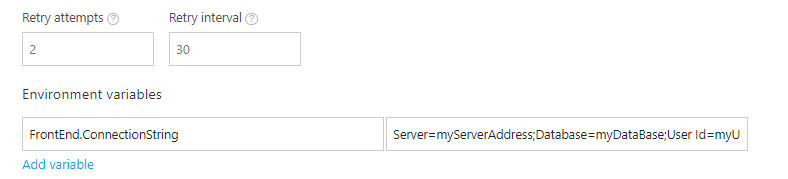
Cloud Service Deploy provider analyzes the deployment package and looks into environment variables to set parameter values with matching names.
Variable should be in format <role_name>.<setting_name>. For example if your .cscfg contains the following:
<Role name="FrontEnd">
  <Instances count="3" />
  <ConfigurationSettings>
    <Setting name="ConnectionString" value="" />
  </ConfigurationSettings>
</Role>
Environment variable name should be FrontEnd.ConnectionString.
When promoting specific build from Environment page you set variables on environment settings page:
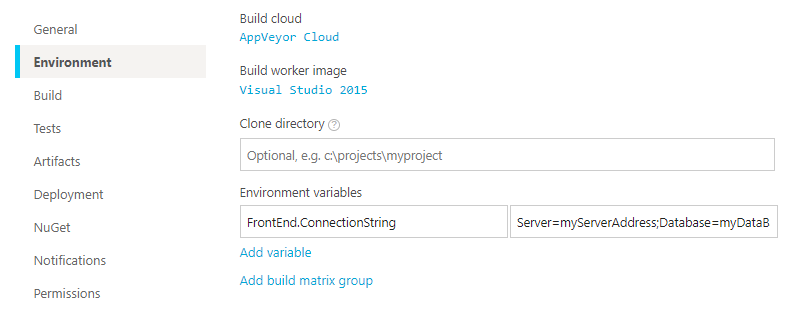
When deploying during the build session environment variables are used instead. You can set build environment variables on Environment tab of project settings, appveyor.yml or programmatically during the build.
Variables defined during the build override those ones defined on Environment level.
Deployment Upgrade Mode
AppVeyor exposes DeploymentUpgradeMode Enumeration with “tweak” environment variable called APPVEYOR_ACS_DEPLOYMENT_UPGRADE_MODE. Default value is Auto. Set it to Manual or Simultaneous if different behavior is required.